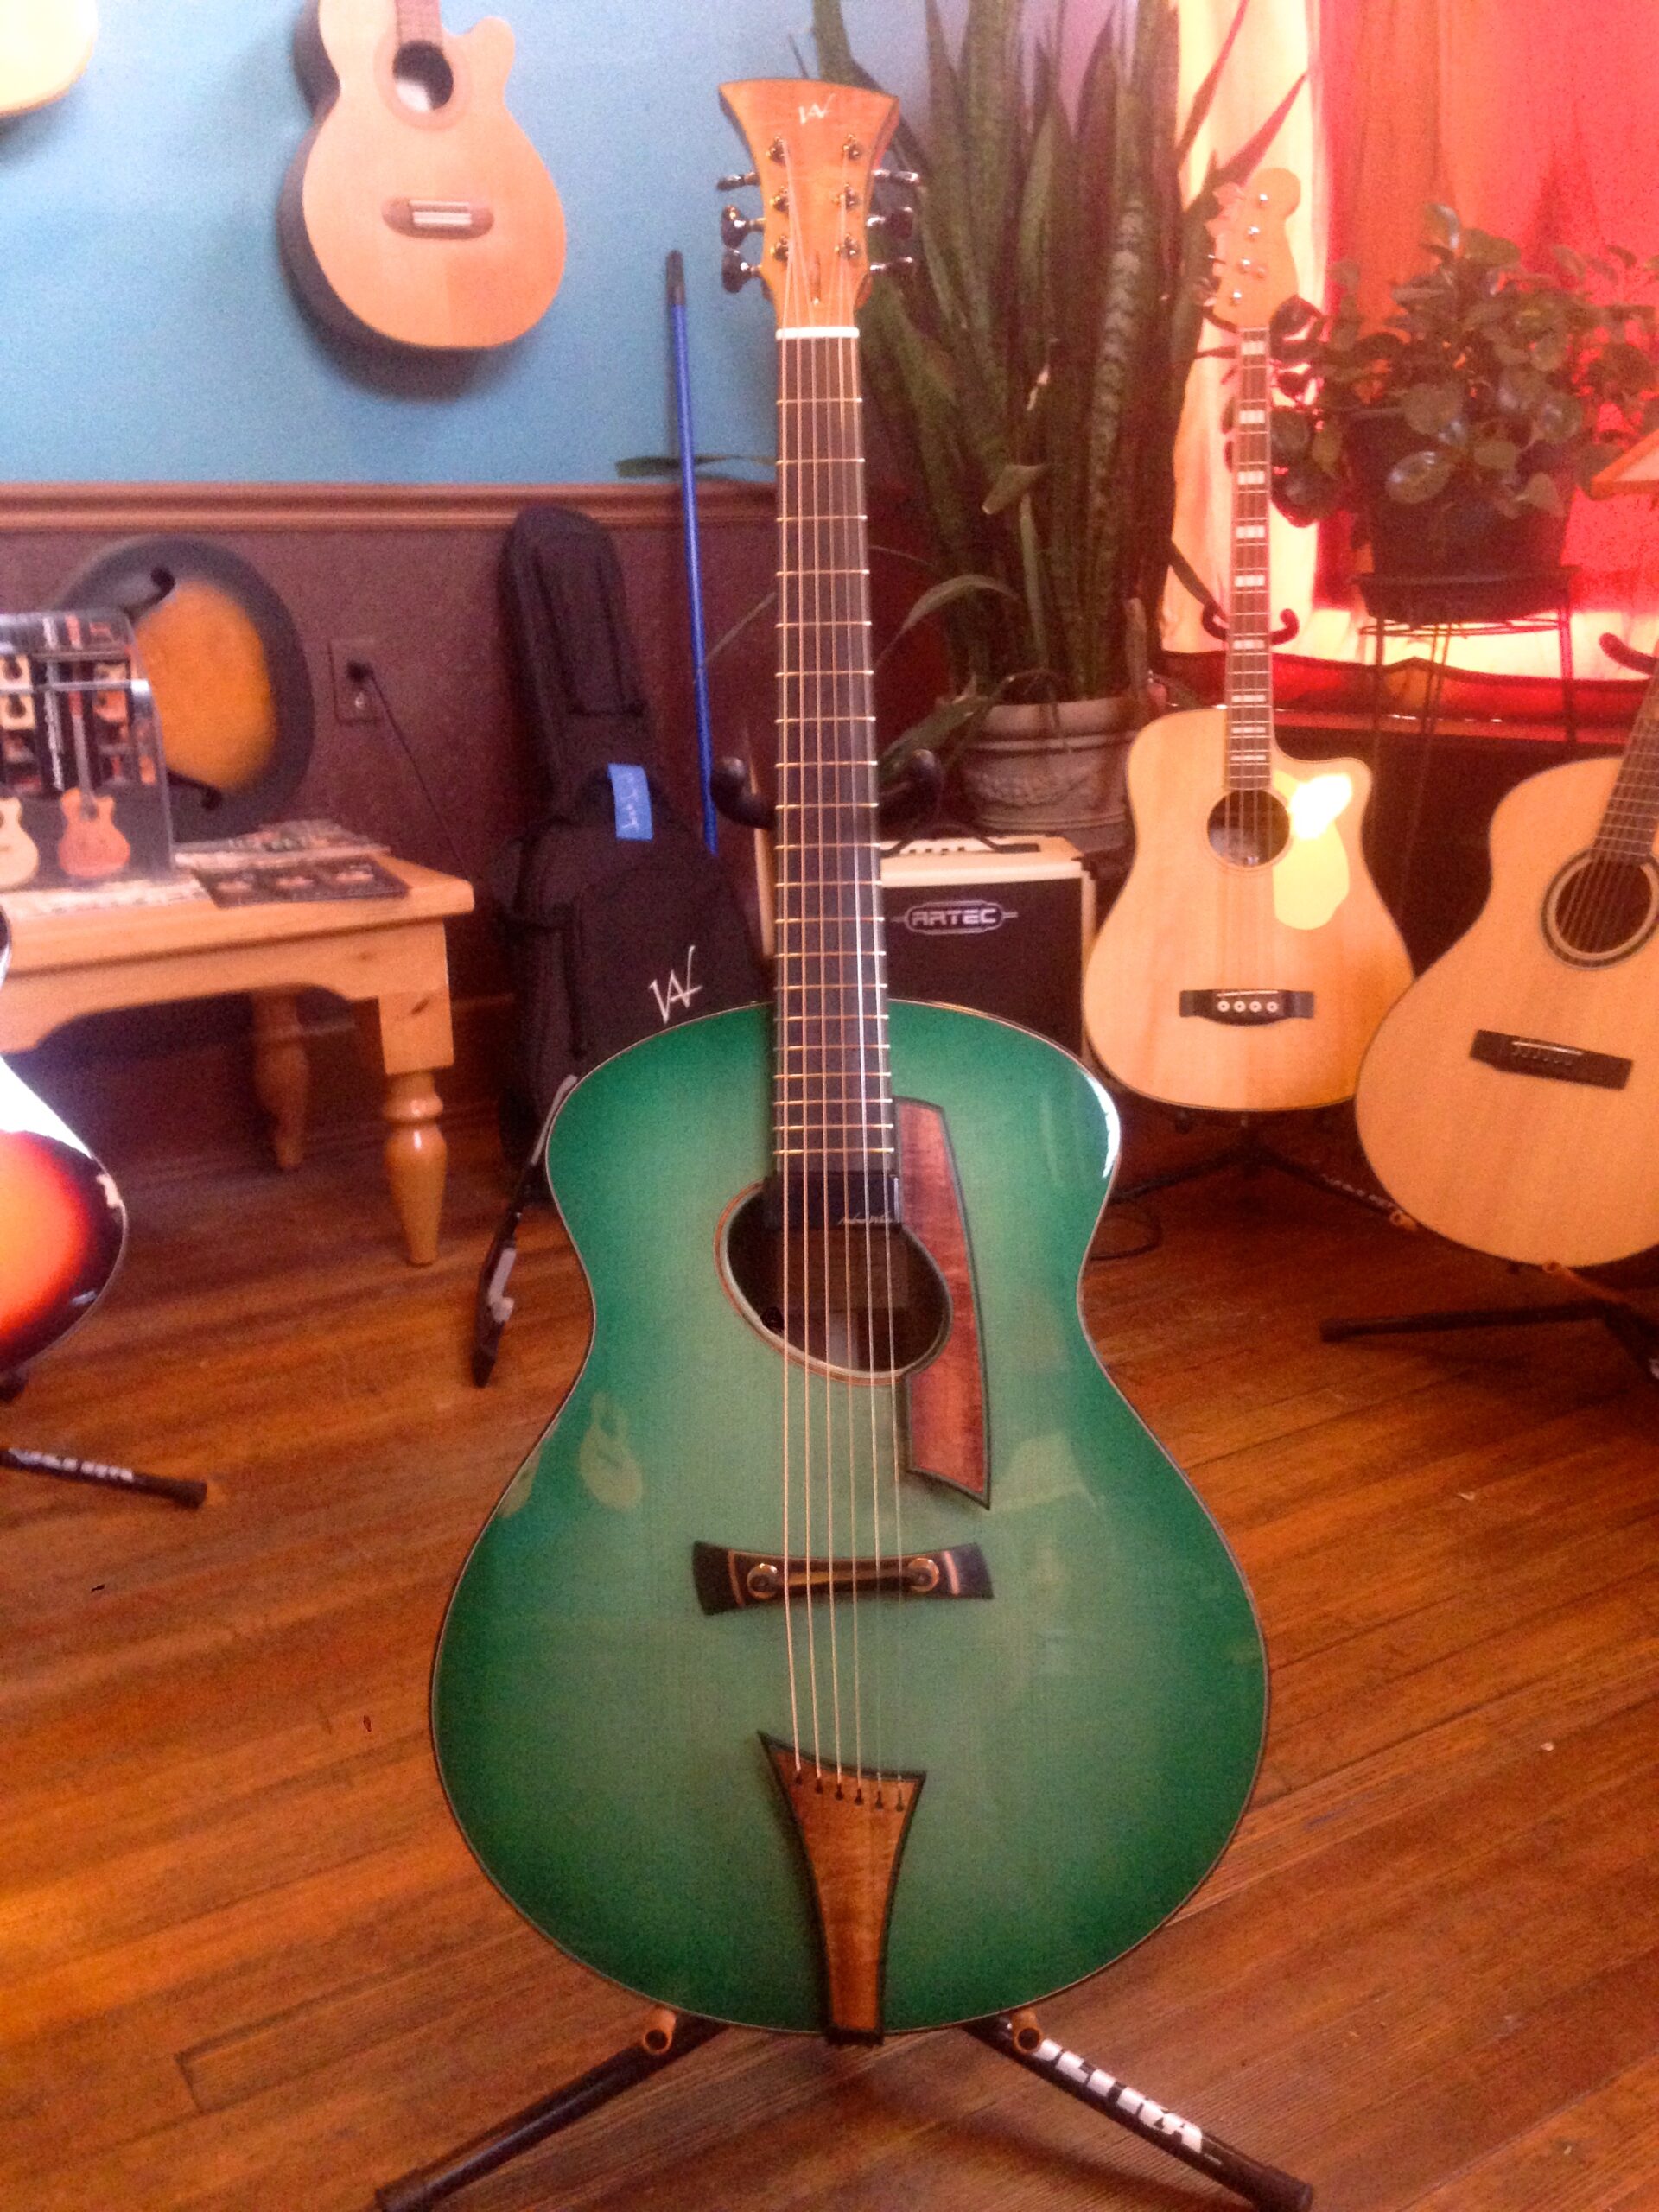
[vc_row][vc_column width=”2/3″][vc_single_image image=”3034″ img_size=”full”][/vc_column][vc_column width=”1/3″][vc_column_text]I really enjoyed building this guitar: the client’s wood choices were spectacular, the green finish was intriguing to me, and Dome Tops are just fun!
[/vc_column_text][/vc_column][/vc_row][vc_row][vc_column width=”2/3″][vc_single_image image=”3065″ img_size=”full”][/vc_column][vc_column width=”1/3″][vc_column_text]A flamed Koa back starts this off. If you’re unaware a dreadnaught guitar is typically called a flat top but it isn’t really. there needs to be a radius in the top and back top provide strength. The radius on a D style guitar back is about 15 feet and tops are 25 to as flat as 52 feet. I call these guitars Dome Tops for a reason. The back AND top hold a 7 foot radius. These guitars are visibly dome shaped.
[/vc_column_text][/vc_column][/vc_row][vc_row][vc_column width=”2/3″][vc_single_image image=”3066″ img_size=”full”][/vc_column][vc_column width=”1/3″][vc_column_text]The braces and rim hold the radius in place. Here you can see just how curved the back(and sound board) will be.[/vc_column_text][/vc_column][/vc_row][vc_row][vc_column width=”2/3″][vc_single_image image=”3067″ img_size=”full”][/vc_column][vc_column width=”1/3″][vc_column_text]This is the back in the ‘Go Bar’ deck. If you look under the back you’ll see a circular piece of MDF. That is called a radius dish and it is carved out to the desired radius. In this case convex 7 feet. If you can picture a ball with a14 foot diameter it would fit in that dish perfectly. In this case we place the back in it and apply our 7 foot radius braces. The fiberglass rods apply pressure to bend and hold the back to shape while the glue dries.[/vc_column_text][/vc_column][/vc_row][vc_row][vc_column width=”2/3″][vc_single_image image=”3068″ img_size=”full”][/vc_column][vc_column width=”1/3″][vc_column_text]Here I’ve mapped out the brace pattern on the inside of the soundboard.[/vc_column_text][/vc_column][/vc_row][vc_row][vc_column width=”2/3″][vc_single_image image=”3069″ img_size=”full”][/vc_column][vc_column width=”1/3″][vc_column_text]Setting up the elliptical soundhole.[/vc_column_text][/vc_column][/vc_row][vc_row][vc_column width=”2/3″][vc_single_image image=”3070″ img_size=”full”][/vc_column][vc_column width=”1/3″][vc_column_text]The channel for the double bound Koa rosette.[/vc_column_text][/vc_column][/vc_row][vc_row][vc_column width=”2/3″][vc_single_image image=”3071″ img_size=”full”][/vc_column][vc_column width=”1/3″][vc_column_text]Nice pic of the rosette installed and level sanded.[/vc_column_text][/vc_column][/vc_row][vc_row][vc_column width=”2/3″][vc_single_image image=”3072″ img_size=”full”][/vc_column][vc_column width=”1/3″][vc_column_text]Here’s a great pic of just how much arc there is in a Dome Top.[/vc_column_text][/vc_column][/vc_row][vc_row][vc_column width=”2/3″][vc_single_image image=”3073″ img_size=”full”][/vc_column][vc_column width=”1/3″][vc_column_text]Check out the scalloped ladder brace![/vc_column_text][/vc_column][/vc_row][vc_row][vc_column width=”2/3″][vc_single_image image=”3074″ img_size=”full”][/vc_column][vc_column width=”1/3″][vc_column_text]The completed top after bracing! The ladder brace is set at scale length. That mean the floating bridge will mount above it and transfer string energy efficiently to the soundboard.[/vc_column_text][/vc_column][/vc_row][vc_row][vc_column width=”2/3″][vc_single_image image=”3076″ img_size=”full”][/vc_column][vc_column width=”1/3″][vc_column_text]The bent sides are clamped and glued up in a jig to make the rim.[/vc_column_text][/vc_column][/vc_row][vc_row][vc_column width=”2/3″][vc_single_image image=”3075″ img_size=”full”][/vc_column][vc_column width=”1/3″][vc_column_text]Here is the completed rim with kerfing radiused to 7 feet. Getting ready to start closing up the body.[/vc_column_text][/vc_column][/vc_row][vc_row][vc_column width=”2/3″][vc_single_image image=”3077″ img_size=”full”][/vc_column][vc_column width=”1/3″][vc_column_text]Fitting the back: notches are cut in the rim to allow clearance for the braces.[/vc_column_text][/vc_column][/vc_row][vc_row][vc_column width=”2/3″][vc_single_image image=”3078″ img_size=”full”][/vc_column][vc_column width=”1/3″][vc_column_text]Same procedure with the soundboard. Create clearance for braces and dry fit the glue joint.[/vc_column_text][/vc_column][/vc_row][vc_row][vc_column width=”2/3″][vc_single_image image=”3079″ img_size=”full”][/vc_column][vc_column width=”1/3″][vc_column_text]It feels like there are waypoints in a guitar’s journey. To me closing up the body is one of those. Notis the 7 foot radius dishes being used as clamp pauls.[/vc_column_text][/vc_column][/vc_row][vc_row][vc_column width=”2/3″][vc_single_image image=”3081″ img_size=”full”][/vc_column][vc_column width=”1/3″][vc_column_text]Look at the flame in that Koa! Here’s a great shot of the unbound body.[/vc_column_text][/vc_column][/vc_row][vc_row][vc_column width=”2/3″][vc_single_image image=”3082″ img_size=”full”][/vc_column][vc_column width=”1/3″][vc_column_text]Nice shot of the bound body plus you can see the dome in the top.[/vc_column_text][/vc_column][/vc_row][vc_row][vc_column width=”1/3″][vc_single_image image=”3084″ img_size=”full”][/vc_column][vc_column width=”1/3″][vc_single_image image=”3085″ img_size=”full”][/vc_column][vc_column width=”1/3″][vc_single_image image=”3086″ img_size=”full”][/vc_column][/vc_row][vc_row][vc_column][vc_column_text]The tailpiece, fingerboard, and finger rest in process. Notice the green binding.[/vc_column_text][/vc_column][/vc_row][vc_row][vc_column width=”2/3″][vc_single_image image=”3087″ img_size=”full”][/vc_column][vc_column width=”1/3″][vc_column_text]There are always moments like this in a build. A moment when you look at the instrument and realize that I’m doing this. That it’s my logo on the headstock and it’s my dream and my vision. I’m grateful for the chance to live this dream.[/vc_column_text][/vc_column][/vc_row][vc_row][vc_column width=”2/3″][vc_single_image image=”3088″ img_size=”full”][/vc_column][vc_column width=”1/3″][vc_column_text]On the bench and ready for final assembly.[/vc_column_text][/vc_column][/vc_row][vc_row][vc_column width=”2/3″][vc_single_image image=”3089″ img_size=”full”][/vc_column][vc_column width=”1/3″][vc_column_text]The completed guitar! I hope you enjoyed the journey. I’m looking for a video of this guitar. I hope I can add one later![/vc_column_text][/vc_column][/vc_row]